Table of Contents
Share This Spread Love
Continue reading as we lead you through every stage of the process, from picking the paint to cleaning up afterward.
Introduction
If you’re planning a painting job, read this step-by-step guide to learn what you’ll need and how to plan and execute it.
Tools Needed
- Bucket
- Remove your clothing.
- Knife for glueing with pliability
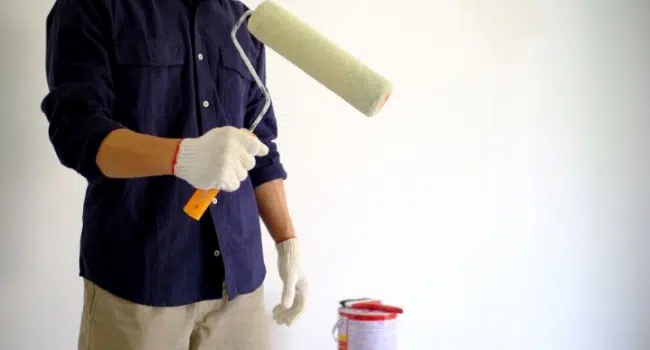
- Roller with a long handle
- Brush for paint
- Tray for painting
- Frame with rollers
- Sponge
- Stepladder
Required Materials
- 1 gallon of paint
- Paint for the ceiling
- Masking paper is a type of paper that is used to
- Samples of paint
- Sticks for stirring paint.
- Tape for painting
- Primer that prevents stains
- Paint is being trimmed.
- TSP or a similar strong wall cleaner
- Two nap roller sleeves, 6 in. x 3/8 in.
- Compound for spackling walls
Step-by-step instructions on how to complete the project (9)
1st step
Pick a colour
- Even before you take up a paintbrush, you should ask yourself, “How do I choose a paint colour?”
- Request that three or four colour samples be mixed for you at your local home centre or paint store.
- To acquire a sense for the paint colours, test your colour samples in various areas of the space. Keep in mind that the colour will fluctuate dramatically depending on the lighting in the room.
Selecting a Paint Finish
- The gloss finish is the most light-reflective of all paint finishes and is also the easiest to clean. It looks fantastic on wood trim, cabinets, and doors.
- A semi-gloss finish is somewhat reflective, long-lasting, and useful in places that must be cleaned often. Kitchens, baths, closet doors, trim, and utility areas are all ideal places to use it.
- The satin surface provides a little sheen to it, making it easy to clean. It’s also suitable for high-traffic areas such as children’s bedrooms, kitchens, living rooms, entryways, and hallways.
- Matte and flat surfaces absorb light rather than reflecting it, making them ideal for walls with flaws. It’s ideal for bedrooms, as well as any uneven or textured walls.
2nd Step
Make sure your flooring and furnishings are safe.
- To protect the floor and carpet near the baseboards from paint splatters and spills, tape down masking paper or rosin paper.
- Cover the floor and any furniture in the room you’re painting with a drop cloth. Fabric drop cloths are preferable to plastic drop cloths because they are less slippery.
3rd step:
Wall Preparation and Trimming
- It’s a good idea to use a heavy-duty cleaner like TSP to clean all the walls and trim before painting and repairing. The paint will adhere better if dirt and oil are removed.
- Use a utility light to shine on the wall to see the flaws in the surface.
- Any nails or bumps on the walls should be knocked down. Spackle or patching compound should be used to fill in the holes and cracks. Using sandpaper, smooth out all of the areas.
- Before painting, always apply a layer of primer to the mended areas.
- Remove the switch plates and outlets.
Step 4
The ceiling should be painted.
- Avoiding paint splatters on your walls and trim by painting the ceiling first.
- Fill a small container with roughly three cups of ceiling paint that you can handle in one hand. Paint the border of the ceiling along the perimeter of the room using a 2-1/2-in. angled paintbrush. (This is referred to as “cutting in.”)
- Paint the ceiling from one end of the room to the other with a 3/8-in. nap roller. Roll the paint on in the same direction as the preceding row, one roller width at a time. If a second coat is required, roll the paint in the opposite direction as the first coat was applied.
5th Step:
Painting the trim is a good idea.
- Paint the trim first, then the walls in most situations. Allow the paint to dry before taping off the trim and painting the walls. If the top edge of your trim isn’t broad enough to hold painter’s tape, start by painting the walls, letting them dry, then taping off the walls and painting the trim.
- Before painting the trim, there are a few things to consider. Is it only the trim that you’re painting, or are you also painting the windows and doors? It’s considerably easier to paint a door if you take it apart beforehand.
- Use a 2-1/2-in. angled paintbrush and high-quality semigloss acrylic enamel paint. Don’t rush it; take your time, do a good job, and don’t be in a rush.
6th step
Tape the edges of the paper
- Before painting the walls, use painter’s tape (not masking tape) to tape off the edges of the trim. By following this approach, as recommended by Five Star Residential Painting Tampa, you can avoid brush and roller marks. Taping the perimeter of the ceiling ensures a lovely clean line between the walls and ceiling.
- For further information on how to pick and utilise painter’s tape, go visit Dublin Deco Painting.
7th step
Walls had been slashed
- Cutting in one wall at a time and immediately rolling out the wall while the cut-in paint is still wet is an excellent practise. The cut-in paint will match the wall paint much better.
- Pour roughly three cups of paint into a tiny container you can hold with one hand, as described in Step 4. Using a 2-1/2-in. angled paintbrush, paint around the edges of trim and baseboards, as well as around the perimeter of the ceiling.
- To protect your brush from drying out between cut-in coatings, cover it in plastic wrap or place it in a freezer bag.
8th step
Using a Roll to Paint the Walls
- Before you begin, use a paint stick to mix the paint.
- Fill the roller tray with paint until it’s little over half-full. If there is too much paint in the tray, it may fall out.
- Paint the wall from the baseboard to the ceiling by loading the roller with paint from the paint tray. To ensure the wall is covered, roll straight back down without reloading the roller.
- Fill the roller with paint once again and begin a fresh row by overlapping the previous one. Fill in the entire wall with paint. The roller’s edges have a tendency to leave paint accumulation lines. Reapply the paint to the lines and mix them in with the remainder.
9th step
Remove the tape and tidy up the strewn-about area.
- Use a flexible putty knife to score along the edge of the tape where it touches the wall before pulling it off the trim and baseboards. (As seen in the photo.)
- Always clean your brushes and rollers well with hot, soapy water.
Recommendation:
- When painting, need excellent lighting; natural sunshine is ideal.
- Before painting, always swirl the paint for at least five minutes.
- To avoid changing colours from gallon to gallon, pour all of the paint into a five-gallon bucket.
- Before you begin your endeavour, gather all of the necessary tools.
- To avoid getting paint on your freckles, wear a cap and paint your clothes.
- In a sealable plastic bag, keep your paintbrushes and rollers fresh.
- Keep a picture folder with all the different paint labels on your phone or computer.
Read more on KulFiy
Tips and Guide to Design a Contemporary Living Room
Bedroom Additions You Didn’t Know You Needed