Table of Contents
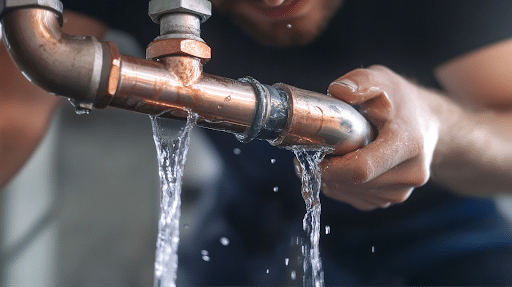
A burst pipe can flood your home in minutes, ruining floors, furniture, and walls. Water from a broken line flows fast and strong, spreading damage quickly. Acting fast helps limit the mess and prevent costly repairs. This guide explains what to do step by step, from stopping the water flow to applying quick fixes until help arrives.
Step 1: Shut Off the Water Supply Immediately
When a pipe bursts, your first move should always be to stop the water.
Find your home’s main shut-off valve. It’s often near the water meter or where the main line enters your house. Turn it clockwise to stop the flow. Doing this right away prevents hundreds of gallons from flooding your home. Even a small pipe leak can waste up to 10,000 gallons of water a year if ignored.
If the damaged line carries hot water, turn off your water heater too. This protects heating elements and stops more hot water from entering the broken pipe. Acting fast can make all the difference in preventing major water damage.
Step 2: Drain and Dry the Area
After stopping the water, clear out any remaining water from your system.
Open all faucets to drain the pressure lines, starting with the lowest faucet in your home. Flush toilets several times to remove water left in the pipes. Use buckets, towels, or a wet/dry vacuum to soak up excess water around the leak. Always wear cleaning gloves to protect your hands from hot water or debris.
Draining the lines reduces pressure and prevents more leaks while you get ready to fix the damaged area.
Step 3: Locate and Inspect the Pipe Leak

Next, find where the problem started.
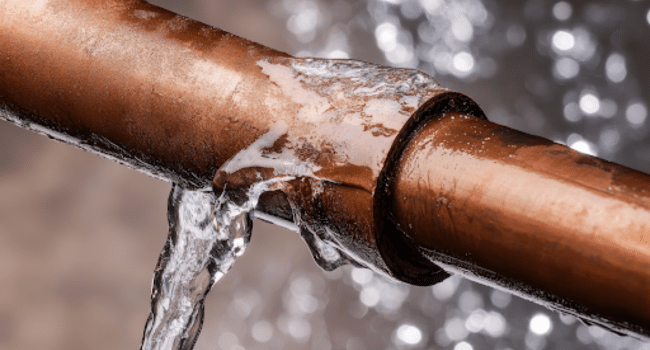
Check the pipes for cracks, drips, or spray. Focus on pipe joints, threads, and u-shaped sections, since these areas often wear out first. If you can’t see the damage clearly, look for damp patches or stains on nearby walls or ceilings.
If the damage is small, you can use a quick fix. But if you find a split or rusted section, it’s best to call a plumber. Persistent leaks or older systems might need professional repair from reliable plumbing services provider like Fremantle Plumbing that help prevent recurring water damage and restore proper flow. A temporary patch can still help stop water loss while you wait for professional plumbing services.
Step 4: Prepare the Pipe for Temporary Repair
Good preparation helps any patch or sealant work better.
Use a metal file or sandpaper to smooth the damaged spot. Remove rust, paint, or buildup around the crack. Then dry the area completely with a clean cloth. If water or dirt stays on the pipe, sealants and tapes won’t stick well.
This quick cleaning step helps make your repair stronger and more reliable, even if it’s only a short-term fix.
Step 5: Apply a Quick DIY Fix
Once the pipe is ready, apply a temporary repair using basic tools or materials.
Option 1: Pipe Putty or Plumbing Epoxy Putty
Pipe putty is a soft compound that hardens after a few minutes. Break off a small piece, knead it until warm, and press it over the leak. Shape it around the area for full coverage. Let it cure based on the label directions, usually 30 to 60 minutes. Once hardened, it forms a tough, water-resistant patch.
Option 2: Self-Fusing Silicone Tape
Self-fusing silicone tape works well for smaller leaks. Stretch the tape and wrap it tightly over the damaged section, overlapping each layer. The tape bonds to itself and creates a watertight seal around joints and threads. It’s a fast, simple option when you need an instant hold.
Option 3: Neoprene Rubber Patch and Repair Clamps
If the leak is bigger or on a pressure line, use a neoprene rubber patch and clamp. Cut a piece of rubber to cover the crack, place it over the area, and secure it with a clamp. The clamp’s pressure helps the patch seal tightly and hold under water flow.
Each of these quick fixes can control the leak until a plumber can make a permanent repair.
Step 6: Check for Water Flow and Leaks After Repair
Before restoring full pressure, test your repair carefully.
Turn the main valve back on slowly. Watch the repaired area closely as the water begins to flow again. Look for drips, moisture, or bubbles forming on the surface. If the leak continues, turn the water off again and reapply your patch or tighten the clamp.
Move slowly through this step. Giving your seal time to set helps avoid re-opening the leak.
Step 7: Know When To Call Professional Plumbing Services
Some leaks need more than a DIY fix.
If the pipe has a long split, deep corrosion, or damage across multiple joints, contact a licensed plumber. Professional plumbing services have the right tools and materials for lasting results. They use high-grade sealants, soldering, or pipe replacement to restore the system safely.
Calling an expert early can prevent future bursts or leaks in nearby pipes and ensure your system runs efficiently again.
Prevention Tips To Avoid Future Burst Pipes
Once the emergency is over, take steps to keep it from happening again.
Here are some simple ways to protect your plumbing system:
- Inspect pipes regularly. Look for rust, moisture, or loose joints every few months.
- Insulate exposed pipes. Protect pipes in attics, basements, or outdoor areas from cold temperatures.
- Control water pressure. High pressure can strain joints and weaken pipe threads.
- Do regular home plumbing checks. A quick visual inspection helps spot problems early before they turn into leaks.
These small habits go a long way toward preventing future damage and saving money on repairs.
Conclusion
Dealing with a burst pipe is stressful, but you can take control with quick action and the right tools. Start by shutting off the water, draining the lines, and applying a short-term fix. Keep repair supplies like pipe putty, silicone tape, and clamps in your home for emergencies. When needed, call plumbing services for a full repair. Staying prepared helps you protect your home, avoid water damage, and handle plumbing emergencies with confidence.
