Table of Contents
When I first started researching solar panels for my home, one question kept coming up: how exactly do you connect these panels to your house’s electrical system? After working with numerous homeowners on solar installations, I’ve learned that this process, while technical, becomes much clearer once you understand the fundamentals.
The truth is, connecting solar panels to your home isn’t as straightforward as plugging in an appliance. It requires careful planning, the right equipment, and—most importantly—a solid understanding of electrical safety. Let me walk you through everything you need to know.
Why Solar Panel Connections Matter More Than You Think
Here’s something that surprises many homeowners: your solar panels produce direct current (DC) electricity, but your home runs entirely on alternating current (AC). This means you can’t simply wire your panels directly to your electrical panel and call it a day.
The connection system serves as the bridge between your solar array and your home’s electrical infrastructure. Get it wrong, and you could face anything from poor system performance to serious safety hazards. Get it right, and you’ll enjoy decades of reliable, clean energy production.
What You’ll Need Before You Start
Every successful solar connection requires several key components. Your solar panels are obviously the starting point, but you’ll also need an inverter system to convert that DC power to AC. The mounting hardware keeps everything secure on your roof, while electrical conduit protects your wiring from the elements.
Don’t forget about the safety components—DC and AC disconnect switches are legally required in most areas, and for good reason. You’ll also need a production meter to track how much electricity your system generates. These aren’t optional extras; they’re essential parts of a code-compliant installation.
The Step-by-Step Connection Process
Getting Your Panels Mounted and Positioned
Everything starts with properly mounting your solar panels. I’ve seen too many DIY installations fail because homeowners underestimated this step. Your mounting system needs to handle wind loads, snow loads, and decades of thermal expansion and contraction.
The positioning matters enormously. Even a small amount of shading can dramatically reduce your system’s output, so take time to evaluate potential shade sources throughout the year.
Connecting Your Panels: Series vs. Parallel
This is where many homeowners get confused, but the concept is actually straightforward. When you connect panels in series, you’re linking them positive-to-negative, which increases the voltage while keeping the current the same. Think of it like connecting batteries in a flashlight.
Parallel connections work differently—you connect positive-to-positive and negative-to-negative, which increases current while voltage stays constant. For most residential installations, series connections work better because they reduce power losses over long wire runs.
Installing Your Inverter System
The inverter is arguably the most critical component in your solar system. It’s doing the heavy lifting of converting DC to AC power, and it needs to be installed correctly to perform reliably for 20+ years.
Location matters here. I always recommend installing inverters in shaded areas with good ventilation—heat is the enemy of electronic components. Your garage wall or a shaded exterior wall usually works well. Avoid south-facing walls that get direct sunlight all day.
Safety First: Installing Disconnect Switches
Every solar installation needs both DC and AC disconnect switches, and these aren’t suggestions—they’re code requirements. The DC disconnect lets you isolate your panels from the inverter, while the AC disconnect separates the inverter from your home’s electrical panel.
These switches serve a crucial safety function. Firefighters need to be able to quickly shut down your solar system in an emergency, and you’ll need them for routine maintenance.
Making the Final Connection to Your Electrical Panel
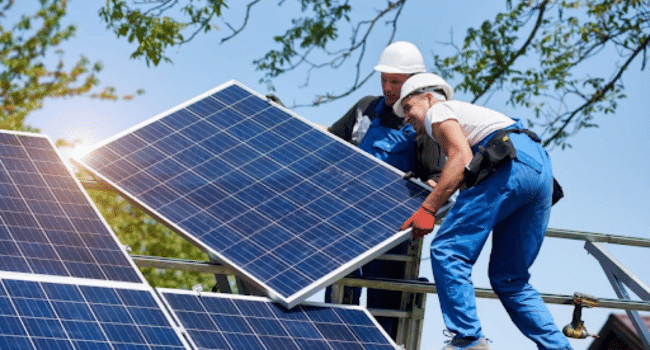
This is where most homeowners should step back and call a professional. Connecting your solar system to your main electrical panel involves working with high-voltage electricity and must meet strict code requirements.
The connection typically involves installing a production meter and coordinating with your utility company for net metering setup. Get this wrong, and you could face expensive repairs or even safety hazards.
Grid-Connected vs. Off-Grid: What’s Right for You?
Most homeowners choose grid-tied systems, and there are good reasons for this. You get the benefits of solar power while maintaining the reliability of grid electricity. When your panels produce more power than you need, the excess flows back to the grid, often earning you credits on your utility bill.
Off-grid systems offer complete energy independence but come with significant challenges. You’ll need battery storage, which adds complexity and cost. You’ll also need to size your system to meet your worst-case energy needs, not your average consumption.
Choosing the Right Solar Panels for Your Installation
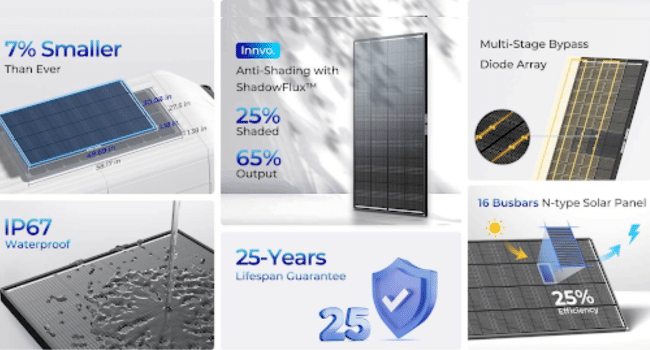
When selecting solar panels for your home connection project, panel quality and performance characteristics make a significant difference in your system’s long-term success. One standout option worth considering is the Renogy 200W ShadowFlux Anti-Shading N-Type Solar Panel.

What sets this panel apart is its innovative anti-shading technology. Traditional solar panels can lose significant output when even a small portion gets shaded—think tree branches, roof vents, or neighboring buildings. The ShadowFlux design minimizes these losses through advanced cell architecture that maintains power production even when parts of the panel are shaded.
The N-type cell technology offers several advantages over conventional P-type cells. You’ll see better performance in high-temperature conditions, which is crucial for roof-mounted installations that can get extremely hot during summer months. These panels also demonstrate superior resistance to light-induced degradation, meaning they maintain their efficiency better over their 25+ year lifespan.
From a connection standpoint, these panels work seamlessly with most residential inverter systems. Their electrical specifications are well-suited for typical string configurations, and the robust construction handles the thermal cycling that roof-mounted panels experience daily.
The 200W output provides a good balance between panel count and system sizing. For most homes, you can create effective string configurations without ending up with odd panel counts that complicate your electrical design.
Getting the Most from Your Solar Connection
Once your system is connected, a few simple practices will help ensure peak performance. Proper wire sizing prevents voltage drop, which can significantly impact system output. Using components rated for your local climate conditions prevents premature failure.
Think about future expansion during your initial installation. Running extra conduit or oversizing certain components costs little upfront but can save thousands if you decide to expand your system later.
The Bottom Line
Connecting solar panels to your house is a technical process that requires careful attention to safety and code compliance. While it’s possible to handle some aspects yourself, the complexity of modern electrical codes and utility requirements makes professional installation the smart choice for most homeowners.
The investment in proper installation pays dividends over the 25+ year lifespan of your solar system. You’ll have peace of mind knowing your system was installed correctly, and you’ll avoid the headaches that come with code violations or improperly functioning equipment.
If you’re considering solar for your home, take time to understand the connection process, but don’t let its complexity discourage you. With the right approach and professional guidance when needed, you can successfully harness the sun’s energy to power your home for decades to come.
When considering the installation of solar panels, it’s crucial to choose a reliable provider to ensure optimal performance and efficiency. For residents in Stockton, NVSP offers expert services tailored to the unique needs of the area. Their team can guide you through the process, from selecting the right panels to ensuring proper connection to your home’s electrical system. By partnering with experienced professionals, you can maximize the benefits of solar energy, reduce your carbon footprint, and enjoy significant savings on your energy bills.
